Setting up a custom goal
Using the graphical world editor, you can specify various goals, such as a desired final position. Using some programming methods, it is possible to add to these goals. In this section, we see a basic example.
If you have Reeborg's World loaded in your browser, run the following program:
World("worlds/examples/simple_path.json", "path")
If you do not have Reeborg's World loaded in your browser, you can simply click on the link below which will load exactly the same world:
http://reeborg.ca/reeborg.html?lang=en&mode=python&url=worlds/examples/simple_path.json&name=path
After the new world is loaded, if you click on World Info, you will see something like the following:
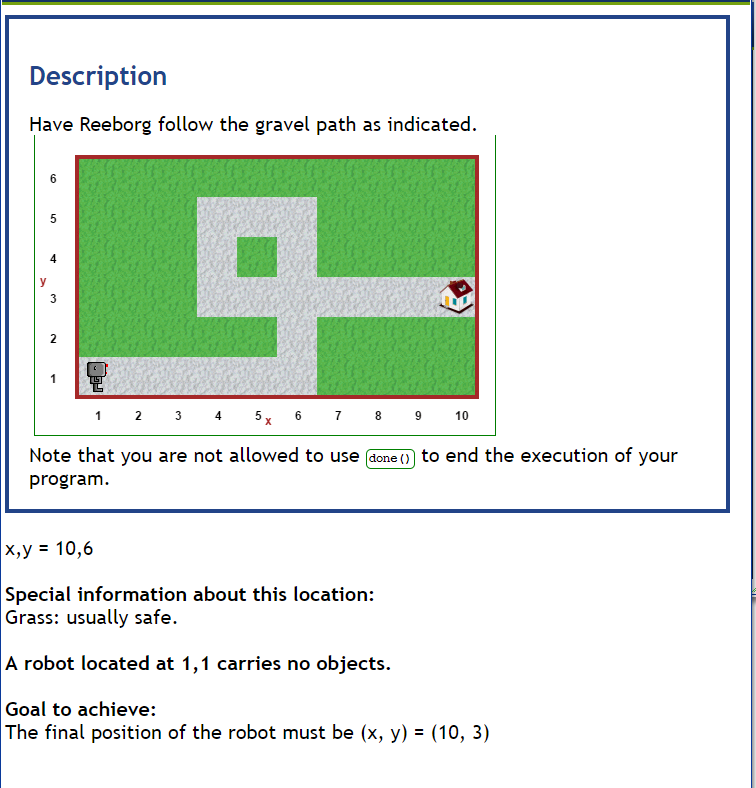
where the path shown is actually an animated gif. So, the goal is not only to reach a set final position, but to do so following a known path.
Before going further, you may want to write test programs that reach the required destination with or without following the instructions. Note that this example will only work if you use Python for your program, using either the editor, the Blockly interface or the Python REPL. [In fact, if you try to change the programming mode to Javascript, you will see that it automatically reverts to the Python default. Try it.]
As an example, you could try to "cheat" and reach the final position following a different path:
for i in range(9):
    move()
turn_left()
move()
move()
#done()
Try it, both as is and by uncommenting the done() instruction which, according to the instructions given, you are not allowed to use.
Explanation
After having tried the above, you may want to load the following world:
World("worlds/examples/simple_path_explain.json")
If you then click on World Info, you will see something that looks somewhat similar to the following image.
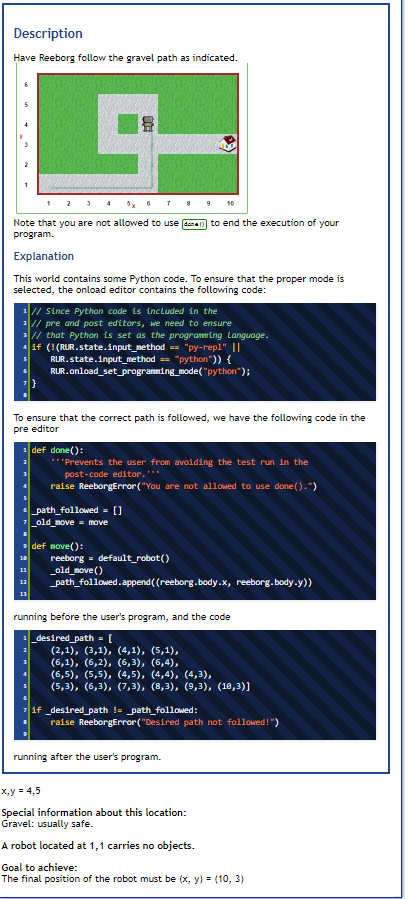
The text on the image above is likely to small to read; furthermore, the world has changed since the above image has been created; clicking on World Info will always show up to date information for this world.
A closer look
I've already mentioned how to add the content of various editors in the world's description, but it's probably a good idea to do so again here in case you have skipped the previous explanation.
The content of the Description editor (shortened to Desc. on the editor tab) is what is shown at the top of the World Info window.
In the case of the second example we have shown, here was the content of that editor when this book was written.
    Have Reeborg follow the gravel path as indicated.
    <br><img src='src/images/simple_path.gif'><br>
    Note that you are not allowed to use
    <code>done()</code> to end the execution of your program.
    <br>

    <h3>Explanation</h3>

    This world contains some Python code.
    To ensure that the proper mode is selected, the onload editor
    contains the following code:

    INSERT_ONLOAD

    To ensure that the correct path is followed, we have
    the following code in the pre editor
    INSERT_PRE
    running before the user's program, and the code
    INSERT_POST
    running after the user's program.
The important thing to note here are the strings INSERT_ONLOAD, INSERT_PRE and INSERT_POST which are replaced by the content of the various editors.
Important consideration
When you design a custom goal, like we do here with the verification in the Post editor that the correct path has been followed, it is essential to prevent the students from using done(), otherwise the code in the Post editor could be bypassed and, as long as Reeborg ends up at the desired final position, the goal would have been determined to be accomplished.
Custom Errors
When using Python, you can use ReeborgError to signal a problem with the code as is done in this example. You can also use ReeborgOK to give a custom message when everything has been done to meet the goal you have set. If you are using Javascript, you must prepend RUR. as in RUR.ReeborgError.